Wednesday, February 24, 2010

How to; Fix Your White Balance

Okay, so the first thing most people start doing when they are trying to improve their photography skills is to turn the flash off at every possible instance, which is completely the right thing to do but can also create a lot of white balance issues.

If you are taking images indoors,with the room light on, you can get pictures where your subject's skin is orange. Today we're going to be discussing how to remove an orange cast from your image and thus make your subjects skin a more normal color.

This is an image that's SOOC (straight out of camera) and it is of a wee man named Grayson.

Open the image in photoshop. At the top of the screen select "Image" from the drop down menu select "Adjustments" and then "Photo Filter" .
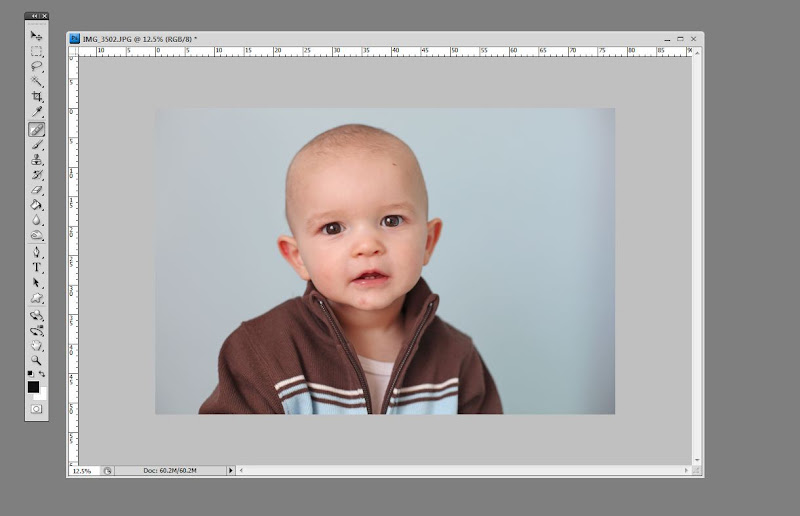
This window should appear. You'll notice that this image is a bit "warmer" (more orange or gold toned) then the previous image. That's because the top filter is selected and the effect is automatically shown on your image.
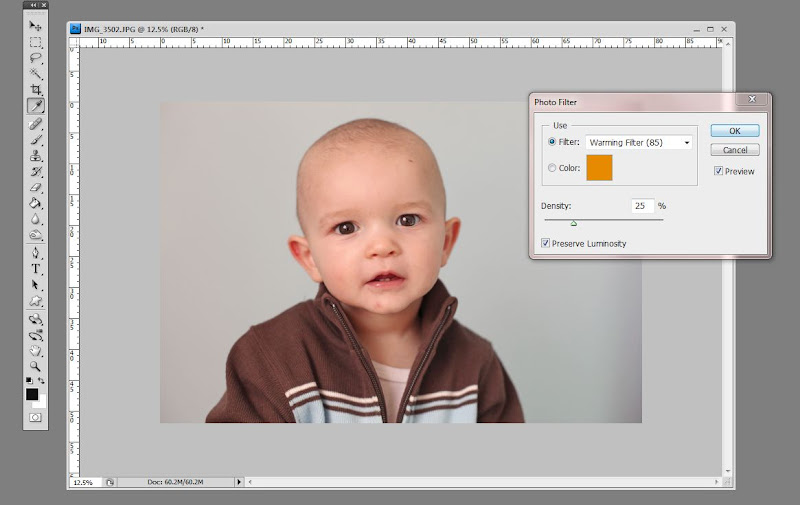
Since we want to remove the excess orange we'll need a cooling filter. There are three cooling filter options, for this image the cooling filter 82 works best. You'll note that the image now looks quite blue.
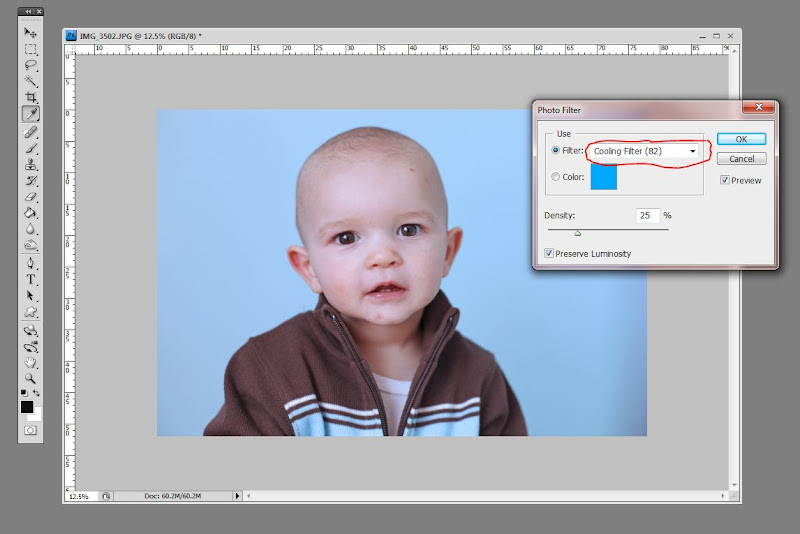
It is always better for an image to be warmer rather then cooler. Think about it; healthy humans sometimes have a tan glow, and warm images in the proper setting (sunsets, sun flair) are very appealing. However blueish skin generally denotes oxygen deprivation or coldness, so you'll want to be careful about fixing your images. Less is more! Slide the density slider to the point where the skin looks corrected.
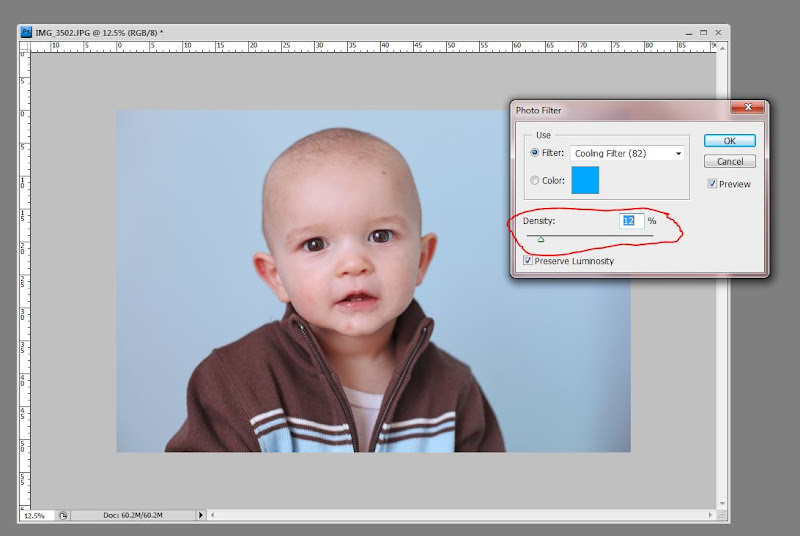
That's it! You're done with the white balance correction! Easy right?
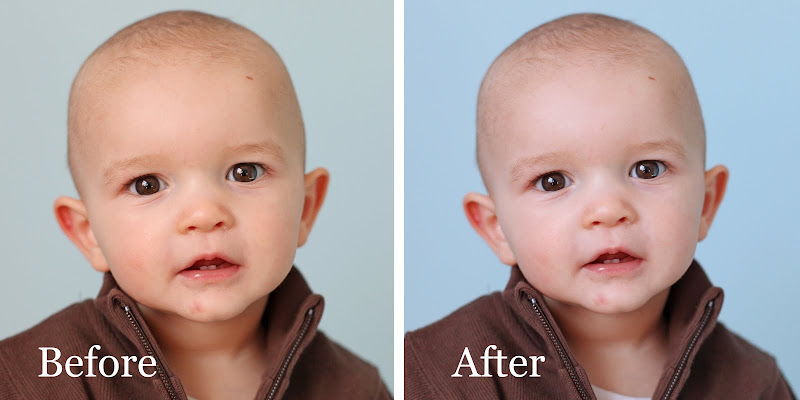
Here is the complete edit on the image.

Tuesday, February 23, 2010

Annie, Hudson and Henry

This sweet girl is Annie, she was very onto getting her picture made. I love that about little girls!

This handsome boy is Hudson. He was a complete goof ball, and also really easy to shoot. (Rare among the 2-year-old set!)


Annie in her pink room


An interesting fact about the name Hudson. This is the 6th little Hudson that I shoot! Since I didn't believe Hudson was that common of a name I looked it up and Hudson is the 176 most popular baby name for boys right now. In comparison, Henry's name is the 78th most popular and I only shoot 2 of those, so we must be in a Hudson pocket here in College Station, which is fine by me as it's quite an attractive name :)


We attempted a sibling shot, and I adore this one even though Hudson was zoning out. It's just so true to life.

Sweet Henry wasn't feeling well that day and he was still smiling for me! What a keeper!

Annie started to get tired of all the picture taking....


We were taking pictures of Henry with a white backdrop and Annie wanted it to be her turn. Isn't her pose cute?

We gave a sibling shot another shot and they did great!

Sunday, February 14, 2010

How to; Fix Problem Skin

Okay, the topic today is how to fix problem skin. This would be applicable for teenagers, kids with bug bites, and bruises and newborns who sometimes have a bit of acne. I do not mind removing these things because I consider them temporary (ie, if the same subject were photographed a week later they probably wouldn't be there). Wrinkles and birthmarks I leave intact.

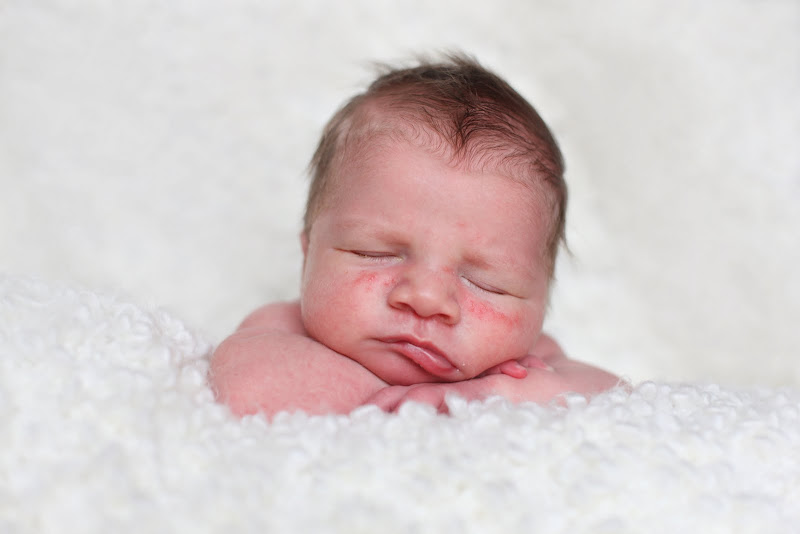
First you want a photograph that is relatively well exposed. Overexposure will lighten the problem, but it will also remove a lot of texture from the skin, under exposure makes the problem a lot more noticeable. This image is SOOC (straight out of the camera) and is properly exposed.

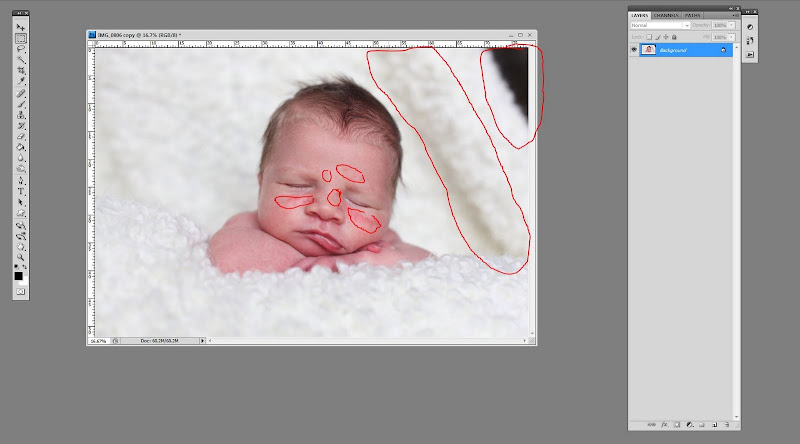
First I identify the areas I want to correct. In this image the background was gaping a bit and the dark area pulls your eye to the right. The baby also had a bit of acne that I wanted to remove.

First I selected the clone tool and set it at 60% opacity and cleaned up the background (this only worked because the background was out of focus, if you had a background that was in focus you would need to use a different tool.)

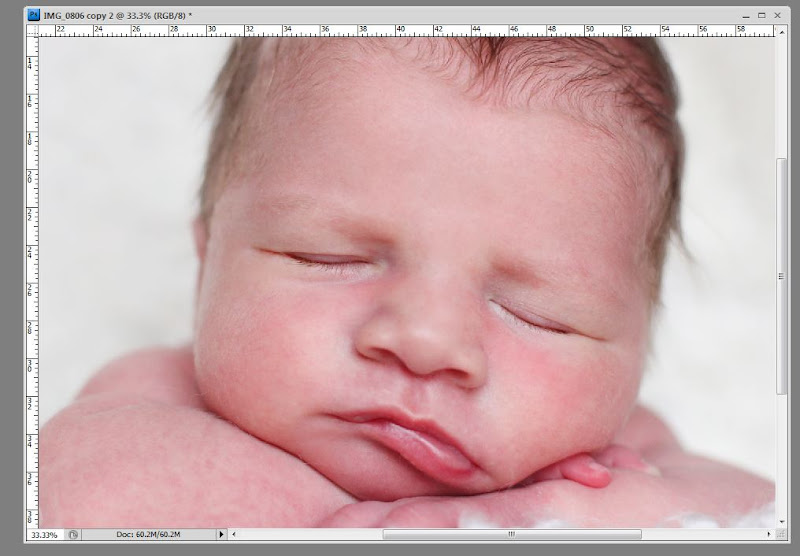
The image then looked like this.

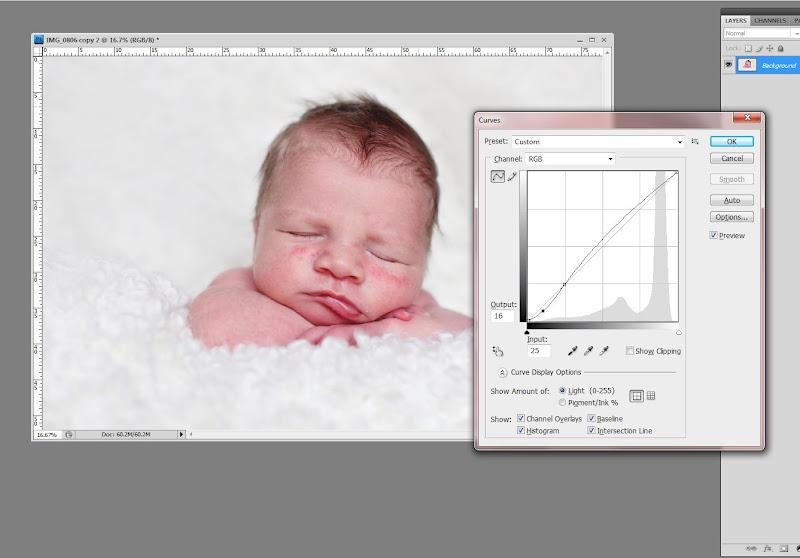
Next I hit control and the "m" key to bring up curves and did a contrast adjustment as seen below. Very simply put, the top point controls the lightness/darkness of the image and the bottom point controls the contrast.

Next I right clicked on the healing brush tool....

and when the drop menu appeared I selected the "Patch" tool.

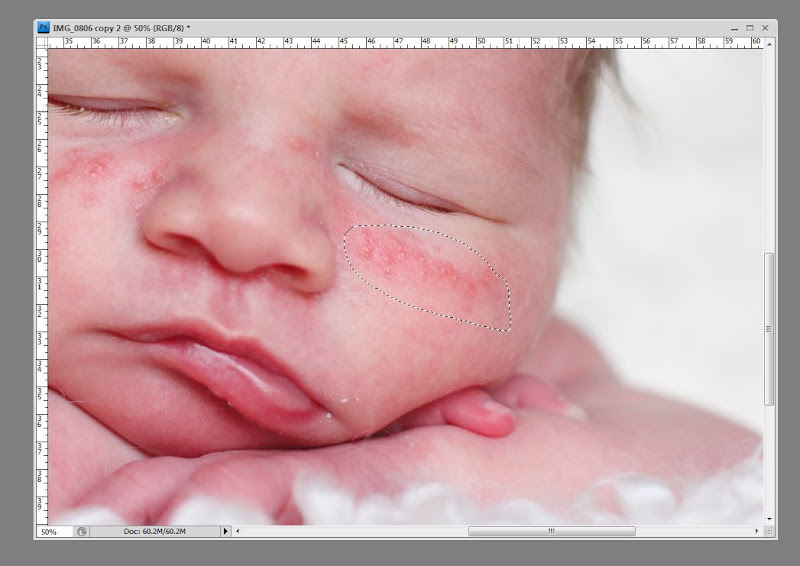
The patch tool works this way; you select the problem skin and then drag the patch to an area of clear skin. The clear skin texture is then copied while the density and color of the original skin is maintained. Sounds easy, right?

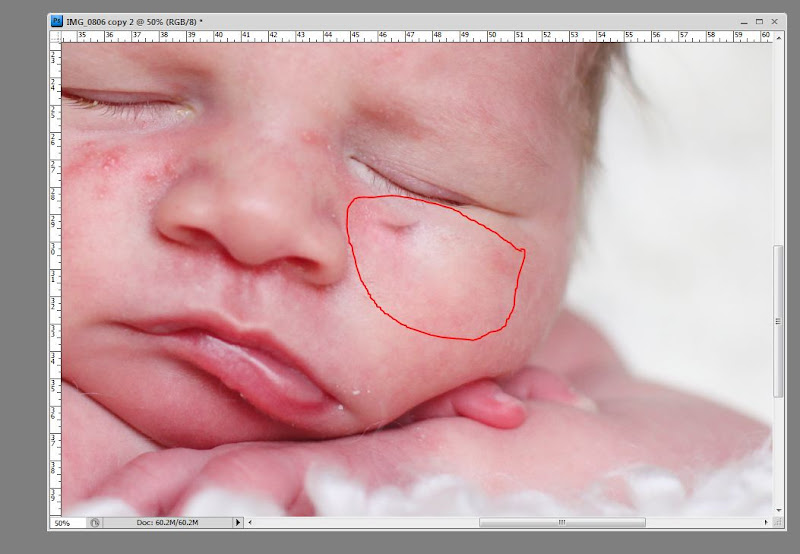
Here's how it can go wrong. If you select too large of a piece of skin it's much easier for it to copy the wrong texture (in this instance, the side of the nostril) and make your image look worse.

You want to select very small piece of your image to copy. For this image I chose pieces that were rough the size of the head of an eraser. My cleaned up version looks a bit like this.

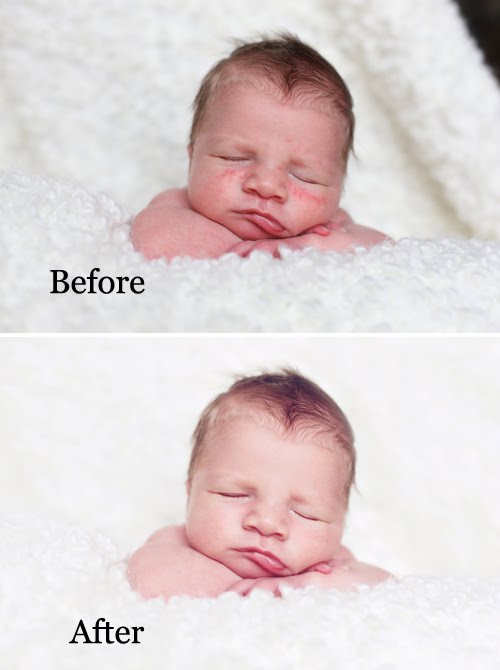
I then color corrected the image, selectively desaturated the shadows, and tinted the image for the final product.

Here's a before and after, just to show the differences.

Questions?

Wednesday, February 10, 2010

How to; Whiten Teeth with Photoshop

What we're going to be discussing today is how to digitally whiten teeth. This is pertinent for a lot of images, perhaps the subject drinks a lot of coffee *raises hands and shuffles feet in embarrassment*, perhaps you like golden afternoon light that tints images yellow, or perhaps your subject has naturally yellow teeth.

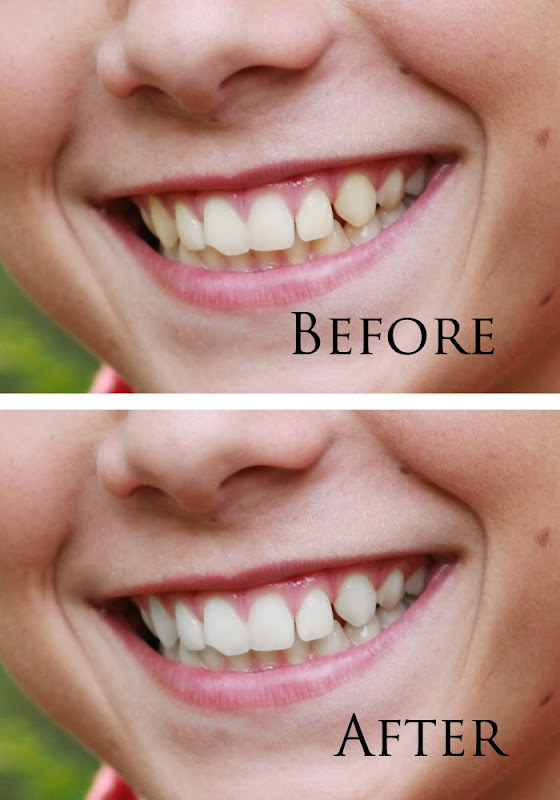
For you moms, most of the time you will need to whiten teeth will be immediately after your child gets their adult teeth. Frequently the new teeth are a bit yellow and it takes them a year or so to whiten up, as in the image below. Fortunately, whitening teeth is one of the easiest things to do in photoshop and takes about 30 seconds.

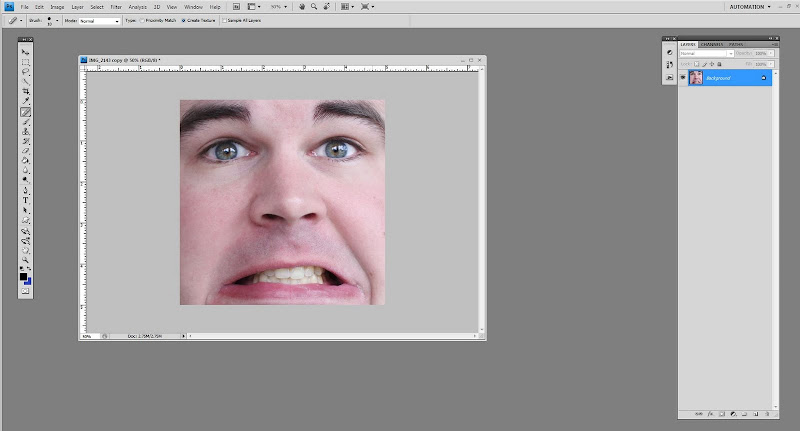
First open the image in Photoshop. (To preserve the model's dignity, I'd like to add that I had difficulty finding a subject with appropriately yellow teeth and I created them in this image.)


Select the lasso tool.

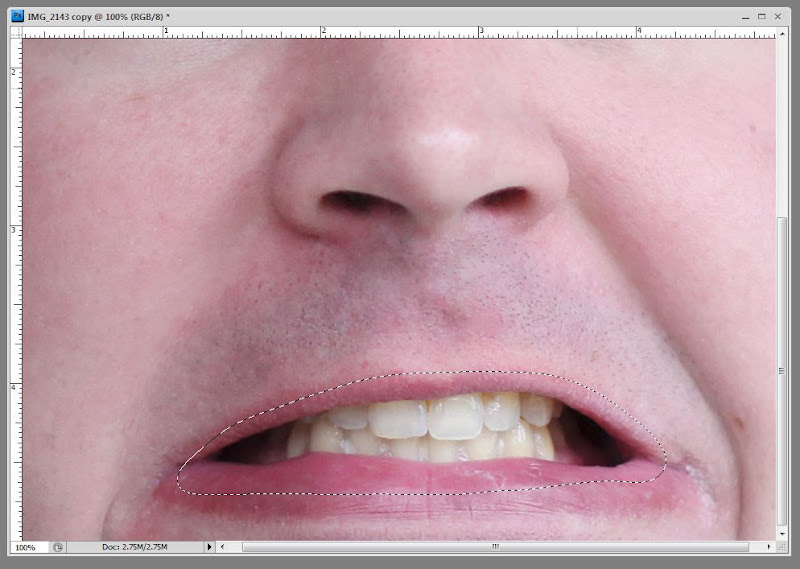
Enlarge the image (control and the "+" key) and lasso through the lips. Try to avoid hitting the skin.

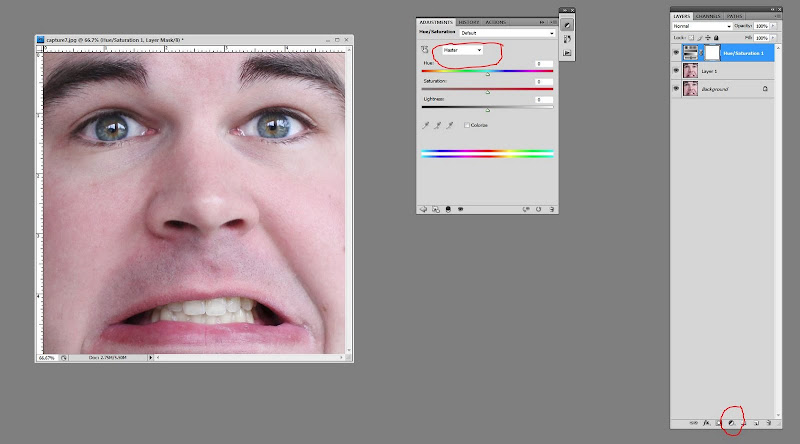
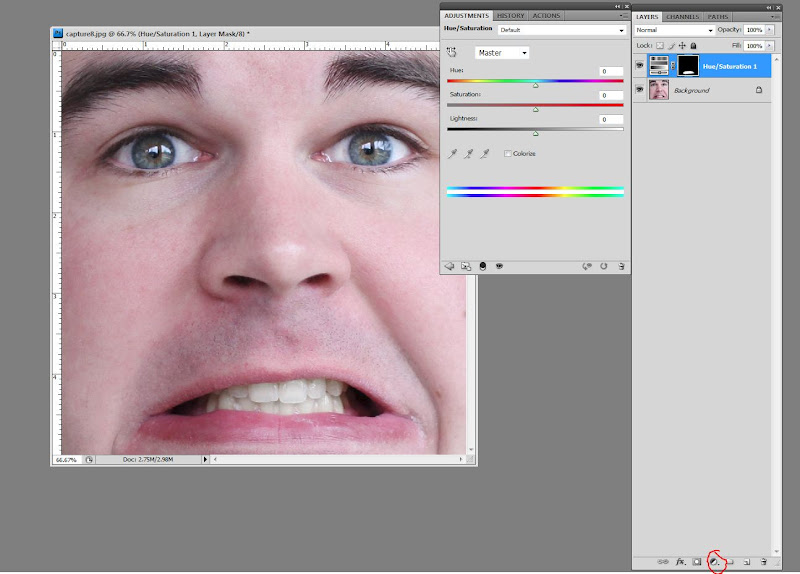
Right click on the circle icon on the lower right hand part of the screen (indicated below in red). Select "hue/saturation" this should create a new layer.

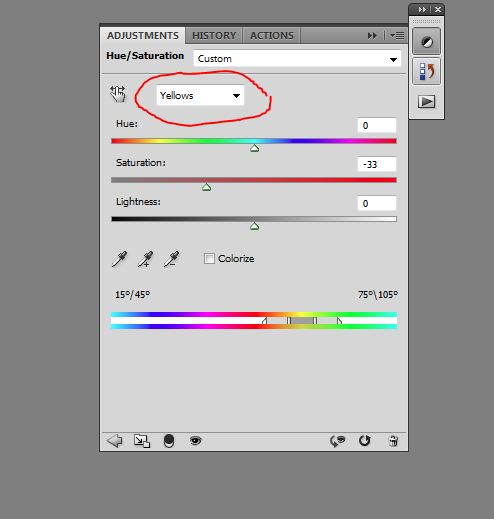
Click on "Master" and select "yellows".

Drag the saturation slider to the left to decrease the amount of yellow in the teeth. Depending on the teeth the amount you need to remove will vary. Stop before the teeth look blue or like a toothpaste ad. (The examples used here may be a bit like that, but I wanted you to see the difference).

Hit control and the "e" key to flatten your layers and you should have perfectly white teeth. :)


Questions?

Thursday, February 4, 2010

How to; Digitally Wiping Noses

So, it's cold outside and you have your little one out running around and taking pictures. Inevitably, their nose with start to run, and it will probably happen right before you take that picture that you love and want to blow up for their grandma.

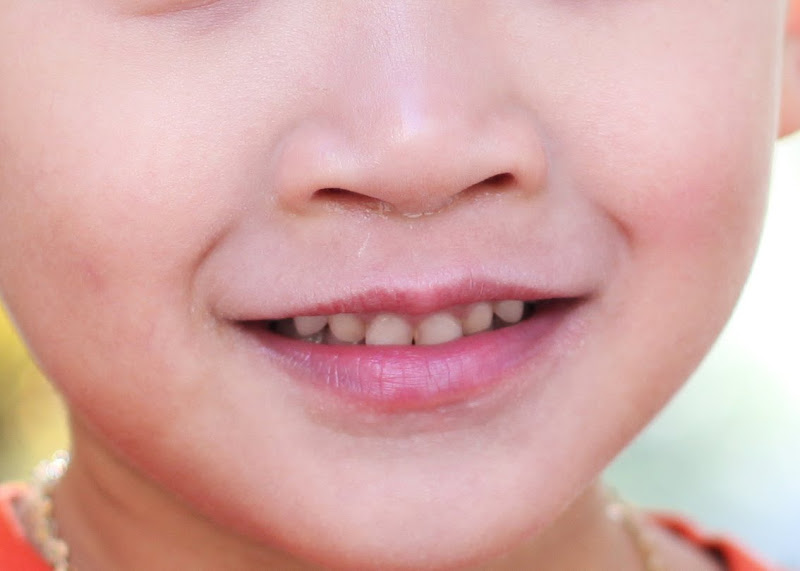
Luckily for you, this is an easy problem with a fast fix. Below is an image that is pretty much SOOC (straight out of the camera), I cropped it to 100% of the image to hide the little one's identity.


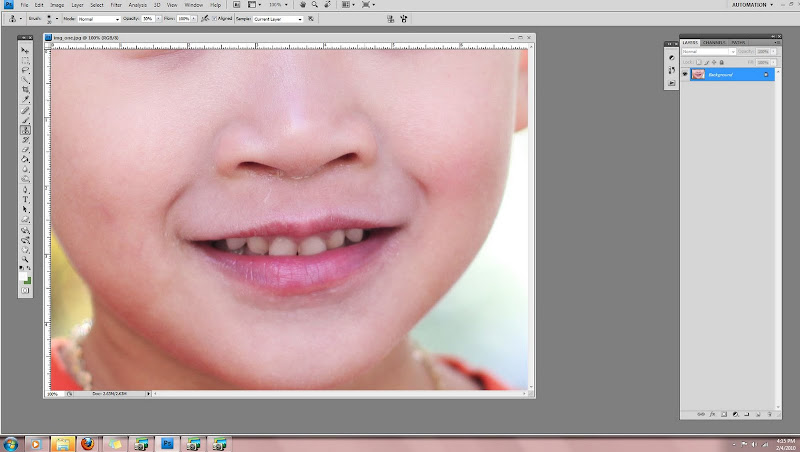
First of all open photoshop and load the image that needs augmenting. Zoom in on the image until only the offending part is visable. To do this hit control and the "+" key (to zoom out you do the reverse, control and the "-" key.) It should look a bit like this.


Next you will select the "spot healing brush" tool, which is circled below in red.

Now, the key to getting a good looking fix with the spot healing brush tool is size. You want your brush to be *small*. To make your brush smaller hit the bracket key. The "]" makes your brush larger, and the "[" makes it smaller. Run your brush over all the white dried mucus and it should clone fixed skin over it. If you accidentally make a mistake and it starts looking worse, hit control and the "z" key to undo the last action you did.

When you are done it should look like this. Much better right?

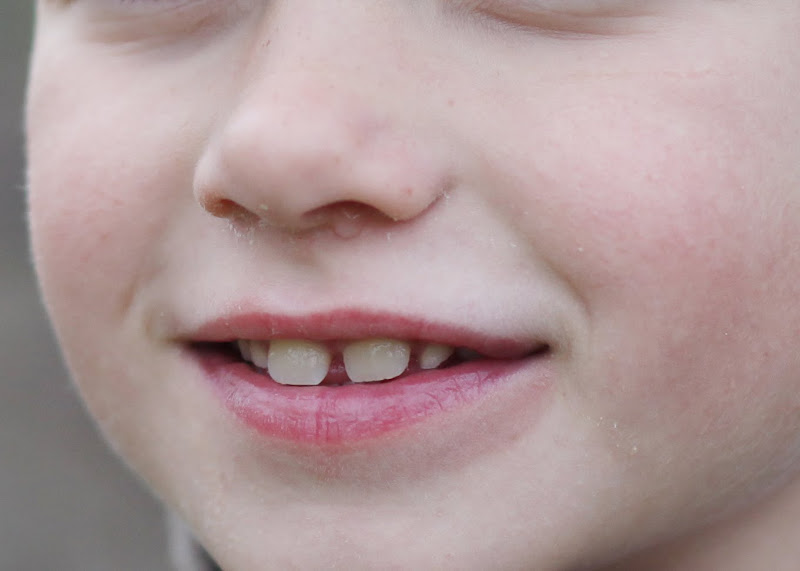
Okay, now for a runny nose. The key difference here is the angle of the nose and the fact that there's a runny bit to hide. With the droplet, you'll want to remove the shiny bit at the top and the darker shading at the bottom and it will disappear. You can do this and quite a bit more with the spot healing brush tool.

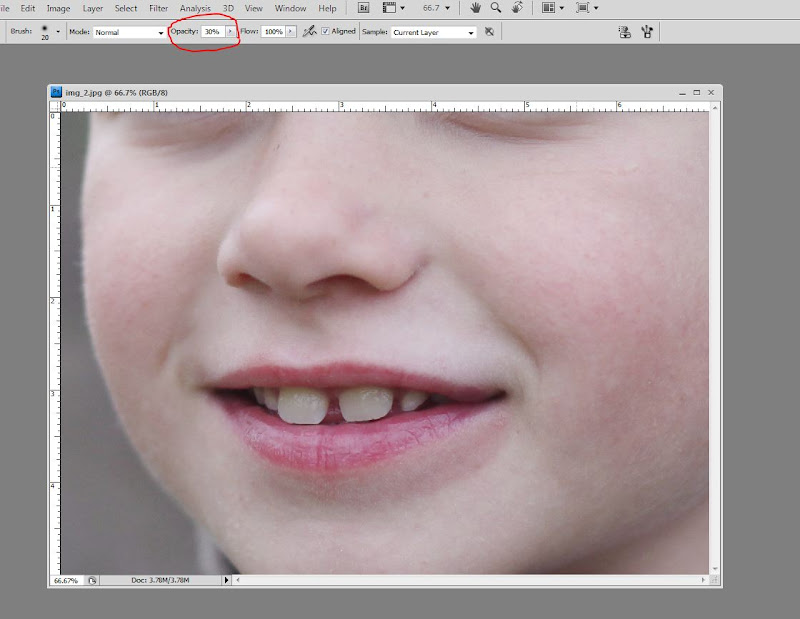
However, for this image some of the shading under the nostrils gets messed up with just the spot healing brush. So, you'll want to select the "clone tool" (see below) to get the rest of the job done.


After you select the clone tool, change the opacity at the top of the page to about 20-30 %, the select the area of skin you would like to mimic (hold down the "alt" key and click on the skin you wish to copy) and copy the right shading using that technique.

You finished product should look a bit like this. Now this image isn't fully edited, but it already is starting to look a lot more like a frame-able image. :)
Questions?

Monday, February 1, 2010

Baker Boys

Last year at this time I was shooting a little guy named Grayson, who looked a bit like this.
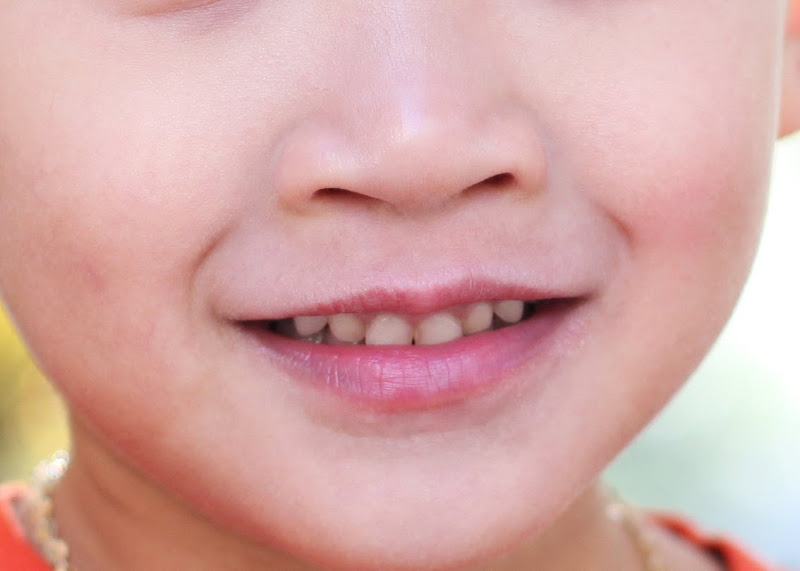


And now he looks like this.


His big brothers, Kenneth and Kyle, are twins. Can you believe people actually ask their parents how they tell them apart?!?!


The clan.