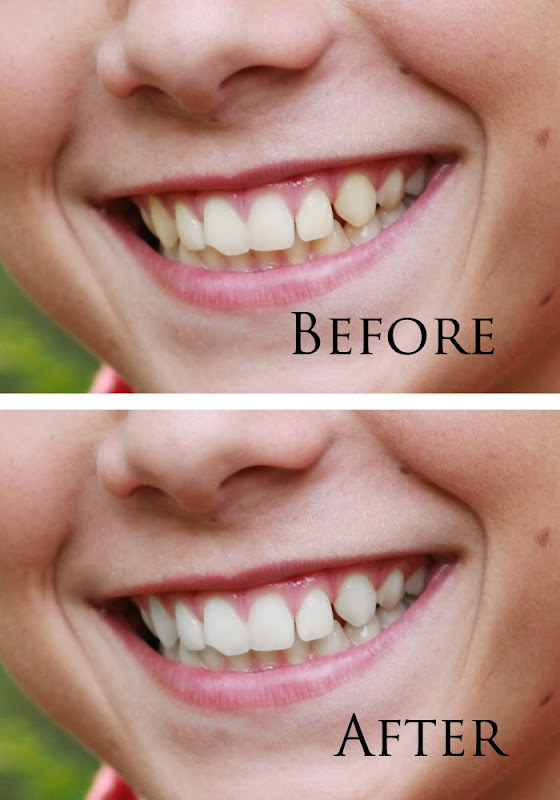
For you moms, most of the time you will need to whiten teeth will be immediately after your child gets their adult teeth. Frequently the new teeth are a bit yellow and it takes them a year or so to whiten up, as in the image below. Fortunately, whitening teeth is one of the easiest things to do in photoshop and takes about 30 seconds.
 First open the image in Photoshop. (To preserve the model's dignity, I'd like to add that I had difficulty finding a subject with appropriately yellow teeth and I created them in this image.)
Select the lasso tool.
 Enlarge the image (control and the "+" key) and lasso through the lips. Try to avoid hitting the skin.
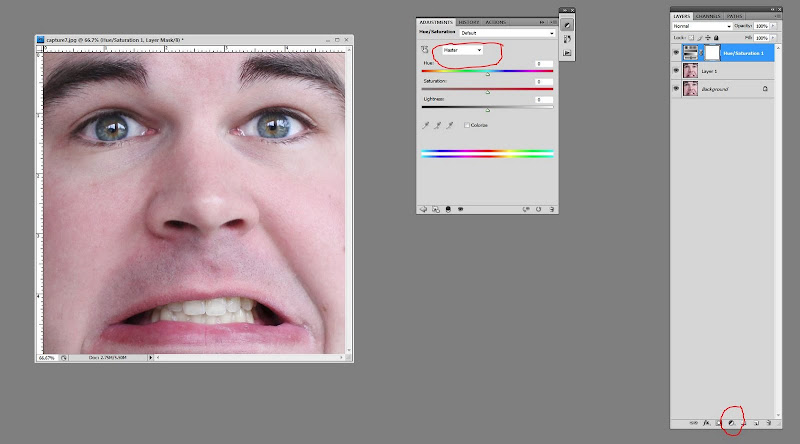
 Right click on the circle icon on the lower right hand part of the screen (indicated below in red). Select "hue/saturation" this should create a new layer.
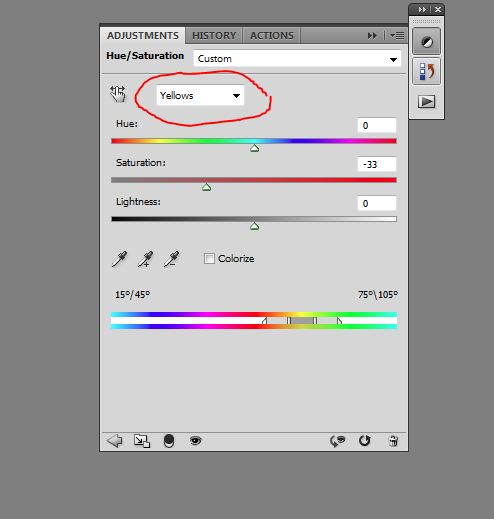
 Click on "Master" and select "yellows".
 Drag the saturation slider to the left to decrease the amount of yellow in the teeth. Depending on the teeth the amount you need to remove will vary. Stop before the teeth look blue or like a toothpaste ad. (The examples used here may be a bit like that, but I wanted you to see the difference).
 Hit control and the "e" key to flatten your layers and you should have perfectly white teeth. :)
Questions?


1 comment:
No questions, but I like that you are posting these tutorials! :-) Thanks!
Post a Comment