
I am currently in Tyler, Texas for the rest of the week.
Besides the basic Thanksgiving festivities, my littlest sister is turning 12, and my mom is scheduled to have surgery and is expected to be in the hospital for a couple of days. I will still be responding to e-mails and phone calls, but it might take me a couple of days to respond.
Tuesday, November 25, 2008
Saturday, November 22, 2008
Senior Portraits: Kendall
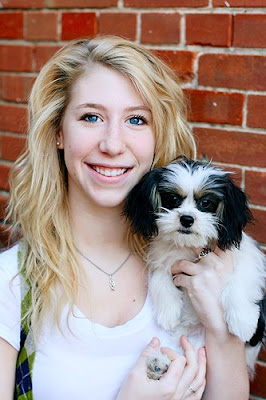
The other day I did some senior portraits for a lovely girl named Kendall. Here she is with her dog, Zoey.
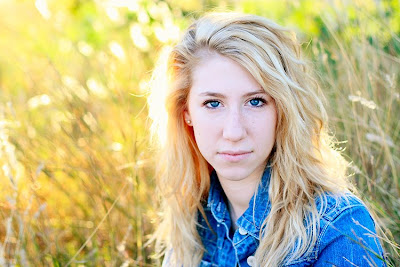
This was one of the first images we took and I while I do like it, I felt like the static background wasn't the way I wanted to go with Kendall. Because of the character of her hair I wanted to go with a more organic, textured background...
 ...like this weeping willow. (Interesting to note, this tree is in the yard of a very patient man, who is very bemused whenever I use it for portraits:)
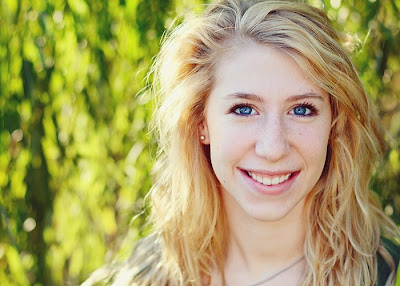
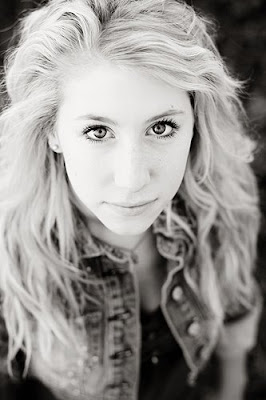
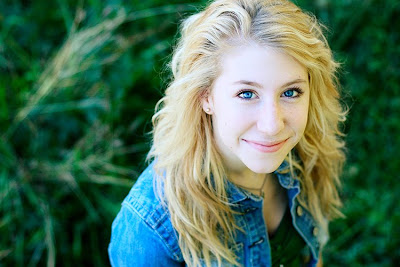
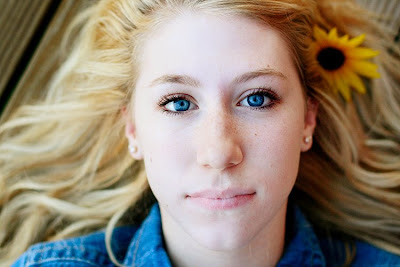
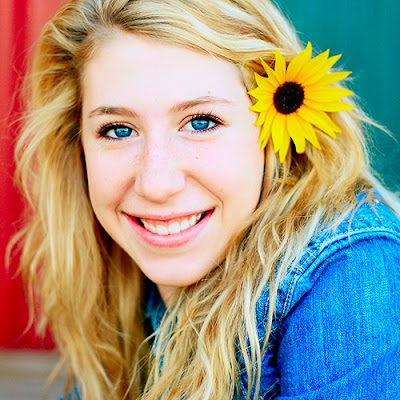 Kendall has the loveliest electric blue eyes! It was about this point in the session when I asked her if she was wearing colored contacts... but she wasn't, her eyes are just that blue!
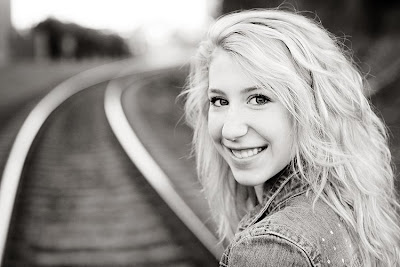
This was one of the first images we took and I while I do like it, I felt like the static background wasn't the way I wanted to go with Kendall. Because of the character of her hair I wanted to go with a more organic, textured background...
 ...like this weeping willow. (Interesting to note, this tree is in the yard of a very patient man, who is very bemused whenever I use it for portraits:)


 Kendall has the loveliest electric blue eyes! It was about this point in the session when I asked her if she was wearing colored contacts... but she wasn't, her eyes are just that blue!


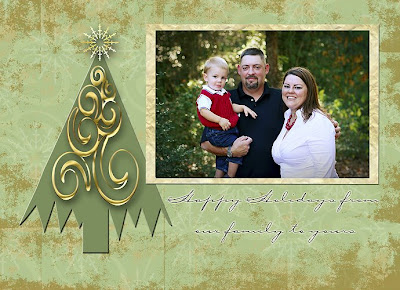
More Options!
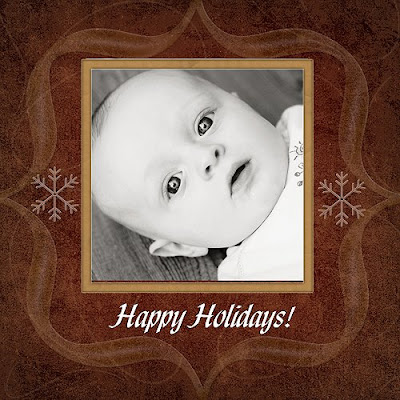
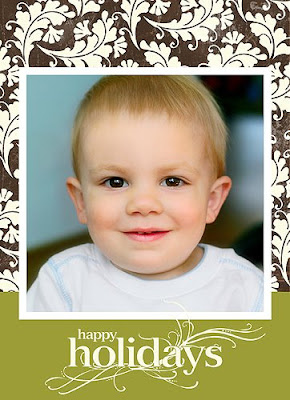
This card was originally used as a a gift certificate for a client who is giving a portrait session as a Christmas gift, however it also makes an awesome family card.
This card can be printed at as a 4x6 or as a 5x7. If you are interested in this card please specify the size card you want, the image you want and the text you want on the card.

This card can be printed at as a 4x6 or as a 5x7. If you are interested in this card please specify the size card you want, the image you want and the text you want on the card.

Thursday, November 20, 2008
Senior Portraits: Travis
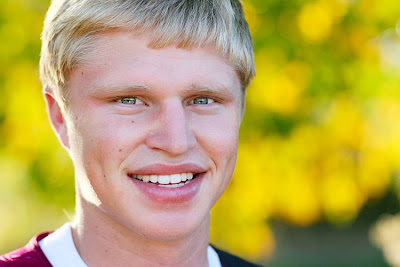
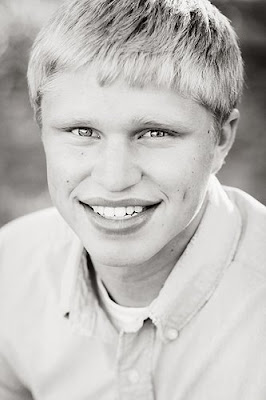
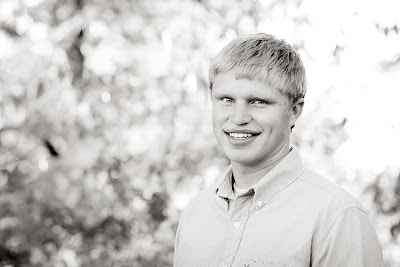
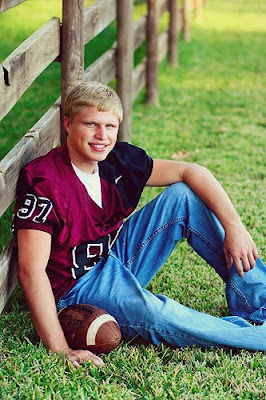
The other day I shot senior portraits for a young man whose family I shoot frequently. They are an awesome family, very photogenic and (best of all) they have a 70-200mm lens that they let me borrow during the shoot. *Does a happy dance* Check out the bokeh! (Umm, bokeh is the out of focus part of the picture, sometime represented as points of light or dots.)
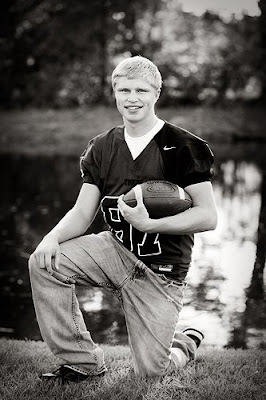
Travis is on the football team so we had to get some shots of him in uniform.
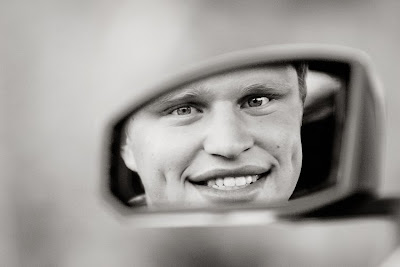
 He also recently got his first car! We got some more standard shots with the car, but this was my favorite.


Travis is on the football team so we had to get some shots of him in uniform.

 He also recently got his first car! We got some more standard shots with the car, but this was my favorite.

Wednesday, November 19, 2008
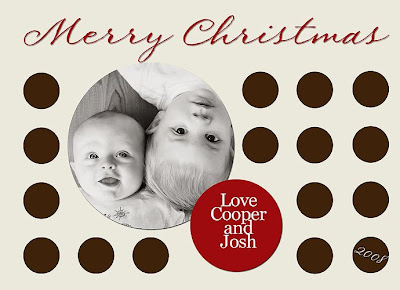
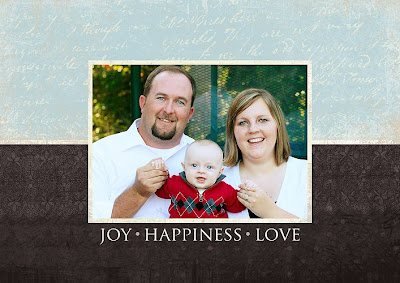
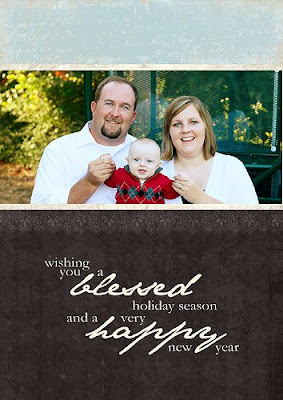
Christmas Cards
So I have a little early Christmas present for a few of you! If you have had portraits taken by me in the last few months (and thus I still have the images on my computer) and you would like one of the cards below, e-mail me and I'll send you the file.
Please specify the image file name that you want in the card (and if you want that image in black and white or color), the card you want and the text you wish to have added to the card.
 Kristen, since these are your images, let me know which one(s) you want and I'll get them to you! :)
Please specify the image file name that you want in the card (and if you want that image in black and white or color), the card you want and the text you wish to have added to the card.


 Kristen, since these are your images, let me know which one(s) you want and I'll get them to you! :)
Tuesday, November 18, 2008
Robert
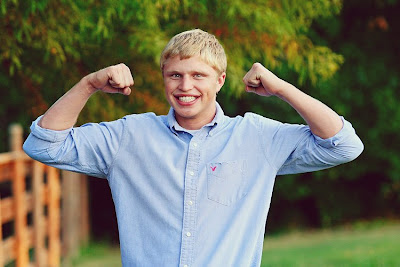
This is my favorite picture of Mr. Robert from his session. I just love the negative space in it!


 He was such a character! When I asked him to get on his stomach for some shots, he dropped and started to do push-ups...he must have done fifteen before I stopped him. I was seriously impressed!


 He was such a character! When I asked him to get on his stomach for some shots, he dropped and started to do push-ups...he must have done fifteen before I stopped him. I was seriously impressed!


Sunday, November 16, 2008
Stagg Family
The Stagg family has three little men and a princess. :)
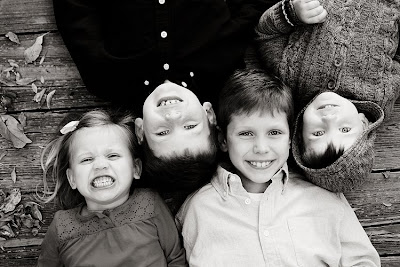
I think this image is hilarious because Grace looks so fierce in it! She can definitely hold her own with her brothers!
 The brothers.
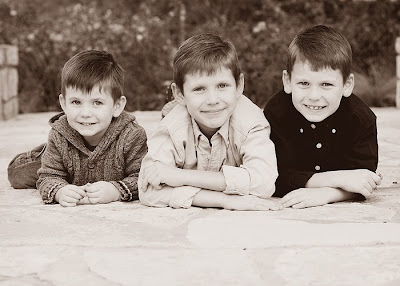
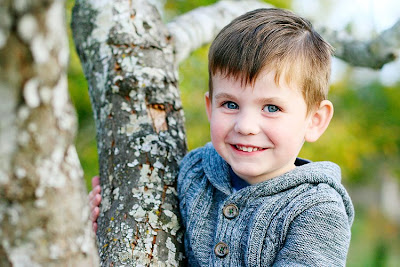
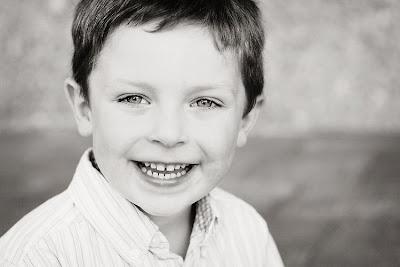
Andrew is eight, and is starting to look so old! Crazy how grown up teeth make kids look so much older!
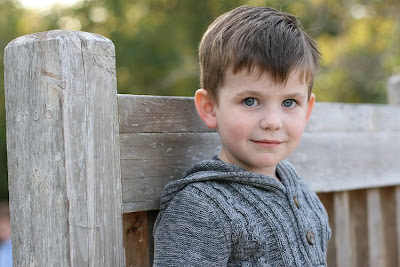
 Ryan is six, and was the cut-up in the family pictures this year.
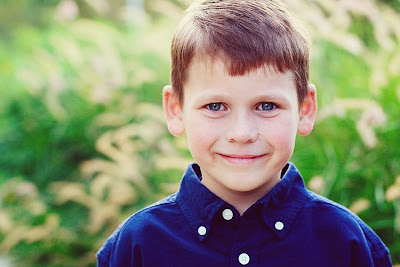
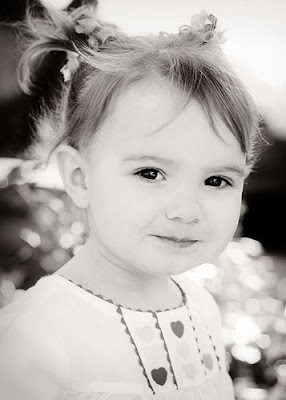
Grace is five, but thinks she is much older.
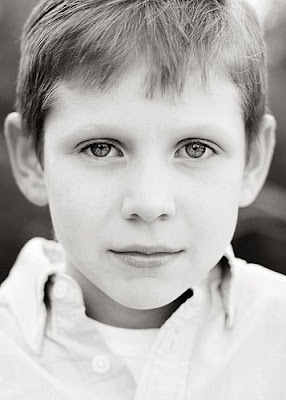
 I think this is the first time (in numerous shoots) that I have gotten a picture of the G-unit without a huge grin on her face. I love how large her blue eyes look, and this wound up as one of my favorite images from the evening.
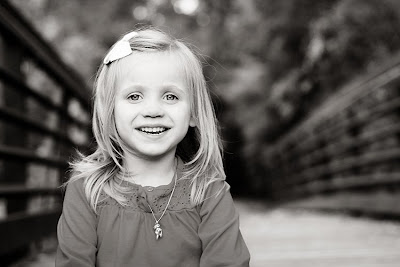
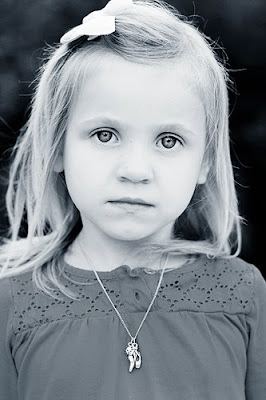 This is more "typical" Grace!
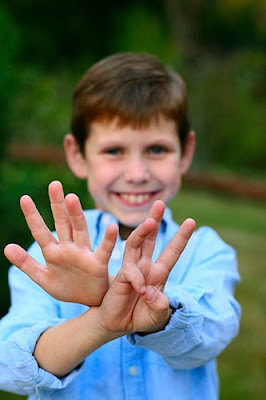
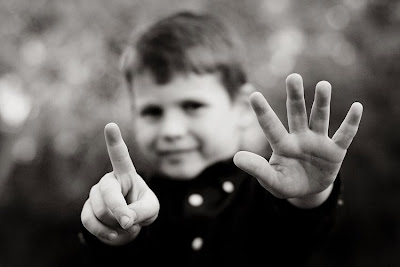
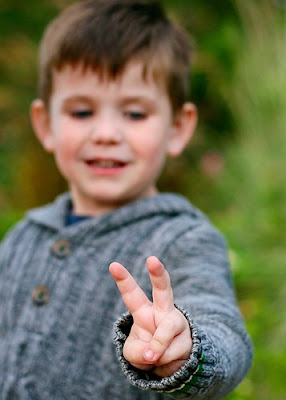
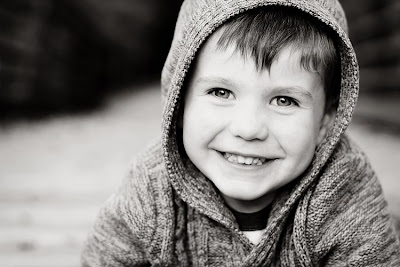
Lastly, Lucus, who is two. (For the record, of all the "finger/age" shots, two is the hardest one to get children to do...love how he is looking at his fingers in this shot.)
I think this image is hilarious because Grace looks so fierce in it! She can definitely hold her own with her brothers!
 The brothers.
Andrew is eight, and is starting to look so old! Crazy how grown up teeth make kids look so much older!

 Ryan is six, and was the cut-up in the family pictures this year.

Grace is five, but thinks she is much older.
 I think this is the first time (in numerous shoots) that I have gotten a picture of the G-unit without a huge grin on her face. I love how large her blue eyes look, and this wound up as one of my favorite images from the evening.
 This is more "typical" Grace!
Lastly, Lucus, who is two. (For the record, of all the "finger/age" shots, two is the hardest one to get children to do...love how he is looking at his fingers in this shot.)


Saturday, November 15, 2008
Black and White
Meet Sophie, the cutest little toddler who was ever forced to endure a photoshoot. :) I've been shooting at Sophie since she was around 5 lbs and 12oz and she still isn't crazy about having her picture made! (Some people must just be born like this right?)
 Fortunately for my self-esteem as a photographer, Sophie has a brother and he adores having his picture made. Sullivan is in love with me (because of my "golden" hair) and I am in love with him (because of his blue eyes). It's a mutually beneficial type of crush. :P
I love that she still has round baby cheeks!


Tuesday, November 11, 2008
How I Edit; A Photoshop Tutorial
Interestingly enough, most of the families I shoot for have Photoshop on their computers, nice cameras and rather adorable children :) So I thought I would throw together a quick tutorial on how to make your pictures look their best using Photoshop. This tutorial was made with Photoshop CS 2, but I tried to use only the basic tools so people with Photoshop Elements could try this too. Click on any image to make the screenshot larger and easier to read.
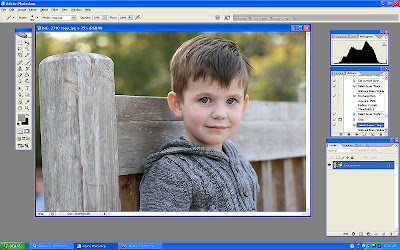
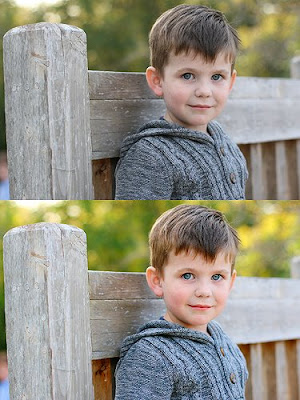
Today we are going to edit this picture of Lucas. The image below is straight out of the camera (SOOC) it was taken at 4:30 on an overcast day. The sun is behind and to the right of the subject.
 First open the selected file in Photoshop. Your screen should look something like this.
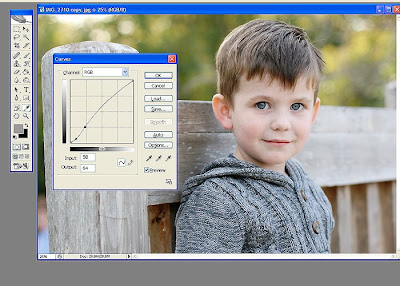
 Bring up curves. On a PC you do this by hitting Ctrl and M in conjunction. The gridbox seen below will appear. Place your cursor on the grid and make two points as shown below. Pulling the top dot upwards will make your entire image lighter (adjusting the exposure) pulling the lower dot downwards will make the image have more contrast. Adjust your image until you are happy with the results. This will obviously vary with each image.
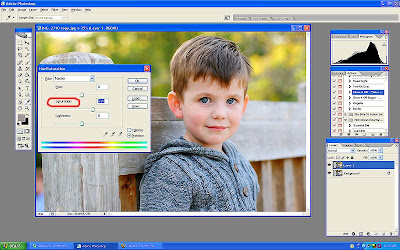
 Next we are going to adjust to the saturation. First hit Ctrl and J, this will make another layer appear. You can see this in the right bottom corner. We will work with this background layer.
Hit Ctrl and U in conjuntion and the screen shown below will appear. With the middle slider (labeled "Saturation" and circled in red below) pull the point towards the right, this will make all the colors in the image brighter. Adjust until the colors appear natural and true to life.
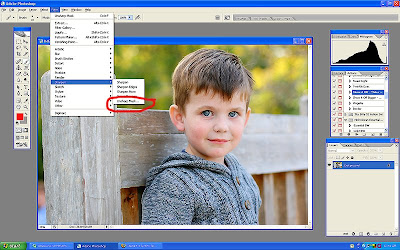
 Now we are going to erase the color off parts of his face that are too bright because shadowed areas show more color then needed with this technique. Click on the eraser (shown in red below) then adjust the opacity of the brush the eraser will use (also shown in red) to about 30%. Erase the color off the ears, hair, nostrils and lips as needed. (When the screenshop was taken, this had already been done.) Now, you will close the layers. Go to the tab at the top of the screen called "Layer" open it and select the option called "Flatten layers".
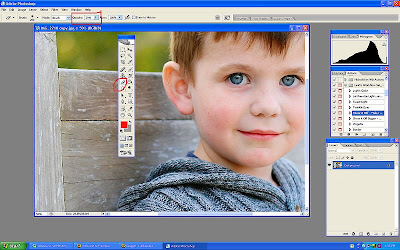 Now, we are going to make his eyes a little brighter. Click on the "Dodge" tool. Then select "Highlights" from the top dropbox, and set the exposure to 5%. Run your tool over the iris of the eye once or twice. Be very careful not to overdo this! Over use of this technique will make your child look possessed!
 Now, we are going to make the entire image look sharper. Click on the tab called "Filter" then on "Sharpen" and then "Unsharp Mask". (See screenshot.)
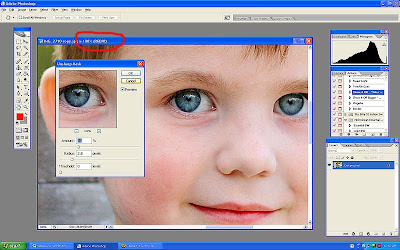
 Now blow your entire image up. You can do this by hitting Ctrl and the + button at the same time. Blow your image up to 100%. You will see this value at top of the screen. Now more the sliders for "Amount" and "Radius", move amount to about 100 and radius to about 1.5 (this will vary for individual pictures) at 100% magnification you will be able to tell when you have sharpened too much as the picture will start to look grainy. Less is more here!!! I have deliberately over sharpened in the screenshot. Once you are done hit OK and then use Ctrl and - to back out of the magnification.
 Voila! You are done!
Let me know if any of that was confusing and I will try to simplify it for you!
Today we are going to edit this picture of Lucas. The image below is straight out of the camera (SOOC) it was taken at 4:30 on an overcast day. The sun is behind and to the right of the subject.
 First open the selected file in Photoshop. Your screen should look something like this.
 Bring up curves. On a PC you do this by hitting Ctrl and M in conjunction. The gridbox seen below will appear. Place your cursor on the grid and make two points as shown below. Pulling the top dot upwards will make your entire image lighter (adjusting the exposure) pulling the lower dot downwards will make the image have more contrast. Adjust your image until you are happy with the results. This will obviously vary with each image.
 Next we are going to adjust to the saturation. First hit Ctrl and J, this will make another layer appear. You can see this in the right bottom corner. We will work with this background layer.
Hit Ctrl and U in conjuntion and the screen shown below will appear. With the middle slider (labeled "Saturation" and circled in red below) pull the point towards the right, this will make all the colors in the image brighter. Adjust until the colors appear natural and true to life.
 Now we are going to erase the color off parts of his face that are too bright because shadowed areas show more color then needed with this technique. Click on the eraser (shown in red below) then adjust the opacity of the brush the eraser will use (also shown in red) to about 30%. Erase the color off the ears, hair, nostrils and lips as needed. (When the screenshop was taken, this had already been done.) Now, you will close the layers. Go to the tab at the top of the screen called "Layer" open it and select the option called "Flatten layers".
 Now, we are going to make his eyes a little brighter. Click on the "Dodge" tool. Then select "Highlights" from the top dropbox, and set the exposure to 5%. Run your tool over the iris of the eye once or twice. Be very careful not to overdo this! Over use of this technique will make your child look possessed!
 Now, we are going to make the entire image look sharper. Click on the tab called "Filter" then on "Sharpen" and then "Unsharp Mask". (See screenshot.)
 Now blow your entire image up. You can do this by hitting Ctrl and the + button at the same time. Blow your image up to 100%. You will see this value at top of the screen. Now more the sliders for "Amount" and "Radius", move amount to about 100 and radius to about 1.5 (this will vary for individual pictures) at 100% magnification you will be able to tell when you have sharpened too much as the picture will start to look grainy. Less is more here!!! I have deliberately over sharpened in the screenshot. Once you are done hit OK and then use Ctrl and - to back out of the magnification.
 Voila! You are done!
Let me know if any of that was confusing and I will try to simplify it for you!
Subscribe to:
Posts (Atom)

