Okay, the topic today is how to fix problem skin. This would be applicable for teenagers, kids with bug bites, and bruises and newborns who sometimes have a bit of acne. I do not mind removing these things because I consider them temporary (ie, if the same subject were photographed a week later they probably wouldn't be there). Wrinkles and birthmarks I leave intact.
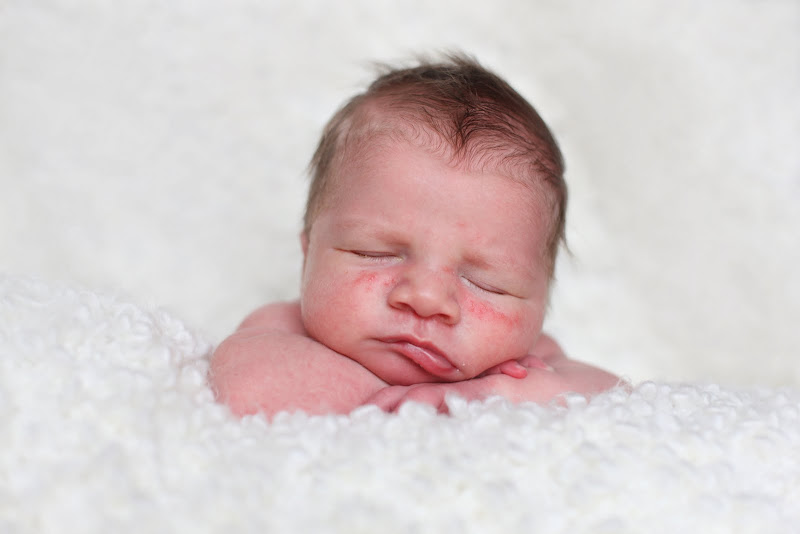
First you want a photograph that is relatively well exposed. Overexposure will lighten the problem, but it will also remove a lot of texture from the skin, under exposure makes the problem a lot more noticeable. This image is SOOC (straight out of the camera) and is properly exposed.
First I identify the areas I want to correct. In this image the background was gaping a bit and the dark area pulls your eye to the right. The baby also had a bit of acne that I wanted to remove.
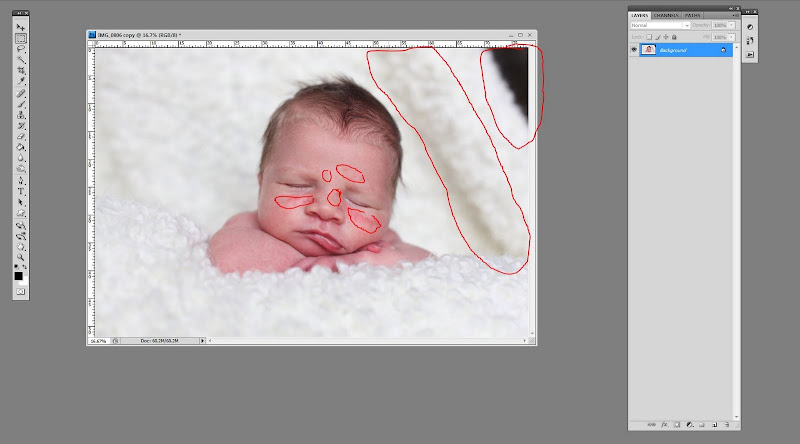
First I selected the clone tool and set it at 60% opacity and cleaned up the background (this only worked because the background was out of focus, if you had a background that was in focus you would need to use a different tool.)

The image then looked like this.
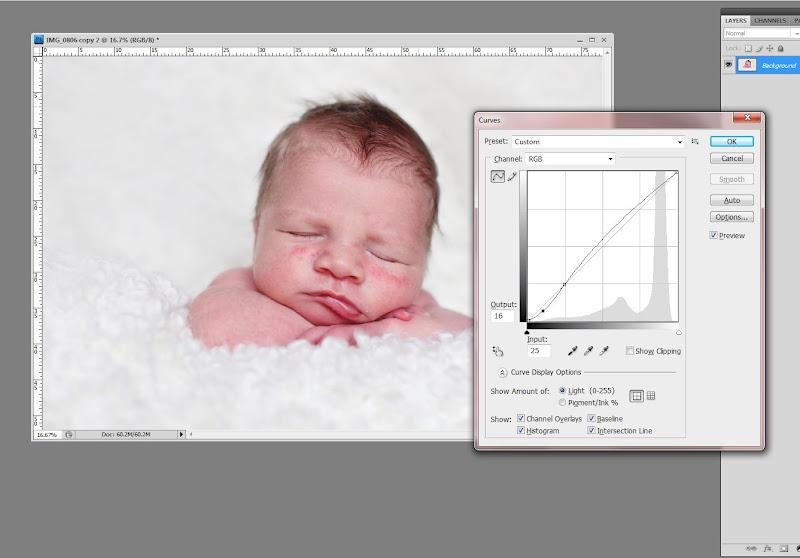
Next I hit control and the "m" key to bring up curves and did a contrast adjustment as seen below. Very simply put, the top point controls the lightness/darkness of the image and the bottom point controls the contrast.
Next I right clicked on the healing brush tool....

and when the drop menu appeared I selected the "Patch" tool.

The patch tool works this way; you select the problem skin and then drag the patch to an area of clear skin. The clear skin texture is then copied while the density and color of the original skin is maintained. Sounds easy, right?
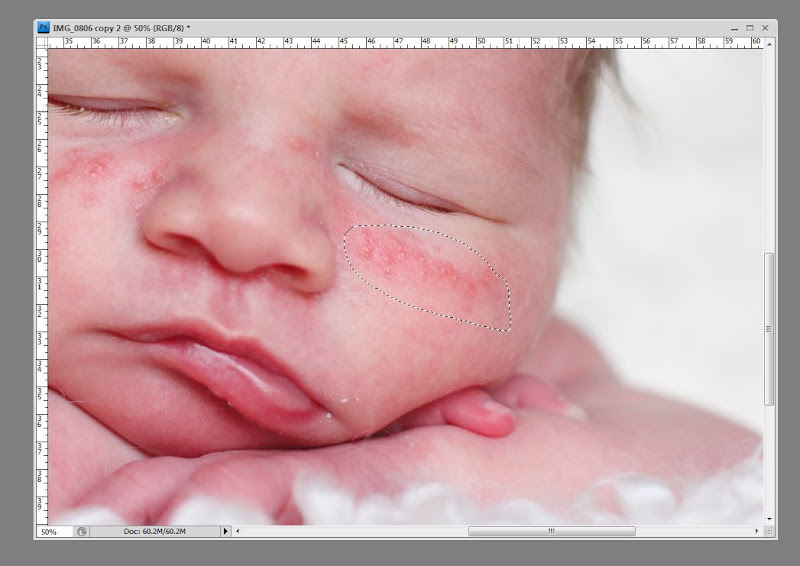
Here's how it can go wrong. If you select too large of a piece of skin it's much easier for it to copy the wrong texture (in this instance, the side of the nostril) and make your image look worse.
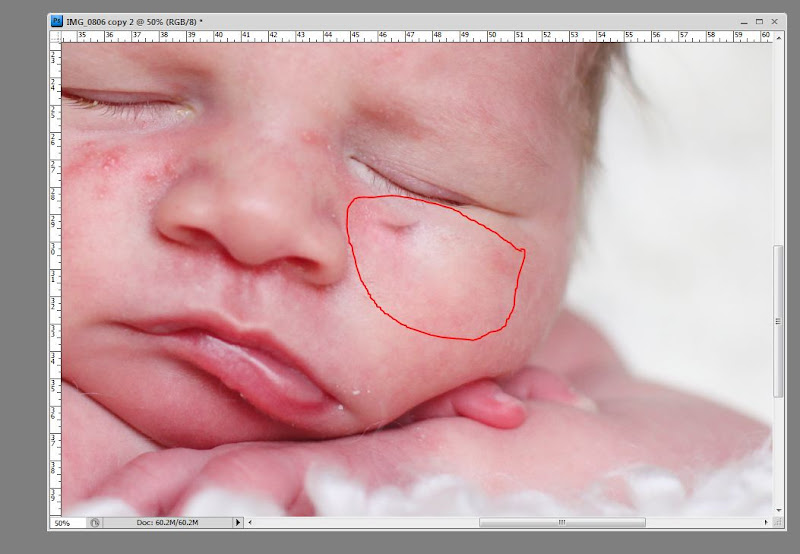
You want to select very small piece of your image to copy. For this image I chose pieces that were rough the size of the head of an eraser. My cleaned up version looks a bit like this.
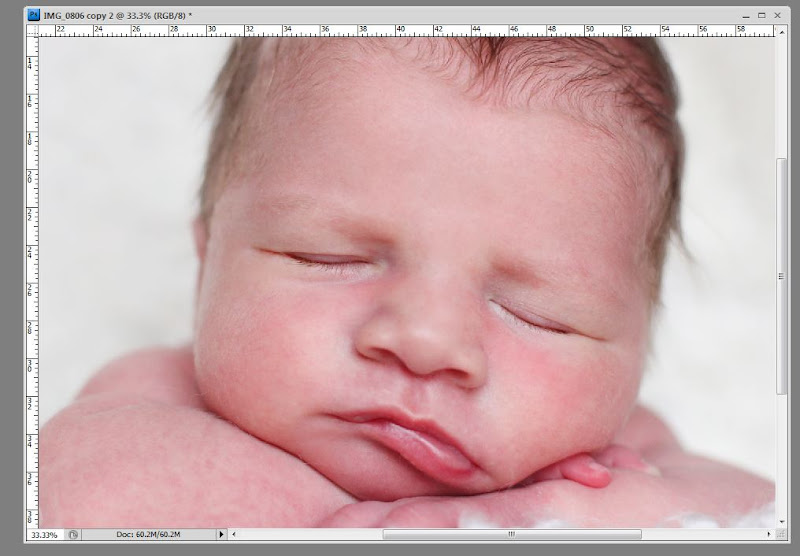
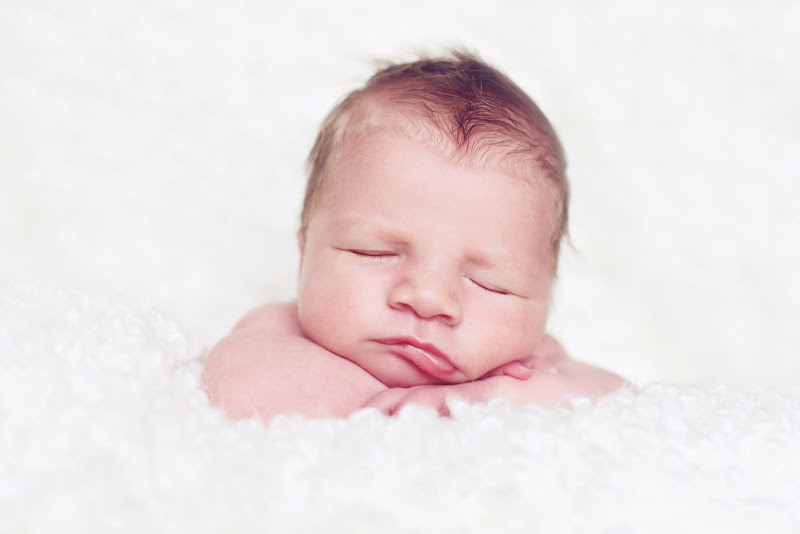
I then color corrected the image, selectively desaturated the shadows, and tinted the image for the final product.
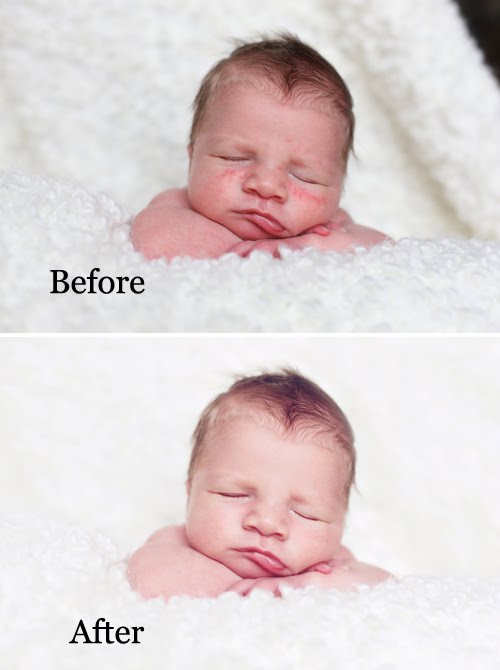
Here's a before and after, just to show the differences.
Questions?

 This handsome boy is Hudson. He was a complete goof ball, and also really easy to shoot. (Rare among the 2-year-old set!)

 Annie in her pink room
 An interesting fact about the name Hudson. This is the 6th little Hudson that I shoot! Since I didn't believe Hudson was that common of a name I looked it up and Hudson is the 176 most popular baby name for boys right now. In comparison, Henry's name is the 78th most popular and I only shoot 2 of those, so we must be in a Hudson pocket here in College Station, which is fine by me as it's quite an attractive name :)
 We attempted a sibling shot, and I adore this one even though Hudson was zoning out. It's just so true to life.
 Sweet Henry wasn't feeling well that day and he was still smiling for me! What a keeper!
 Annie started to get tired of all the picture taking....

 We were taking pictures of Henry with a white backdrop and Annie wanted it to be her turn. Isn't her pose cute?
 We gave a sibling shot another shot and they did great!


